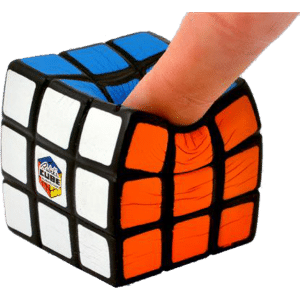
Do you already own a Rubik's cube ? If not go get the orginal one at Amazon for a start !
Menu
- 1 The quick and easy solution to solve a Rubik's cube
- 2 Step 1 : Build a cross
- 3 Solution step 2 : Finish the first layer
- 4 Solution step 3 : Solve the second layer
- 5 Rubik's cube Solution step 4 : Yellow cross on the top layer
- 6 Solution step 5 : Yellow face on the top layer
- 7 Solution step 6 : Solve the corners
- 8 Final step : Edges permutation
The quick and easy solution to solve a Rubik's cube
 In this page, you will find the Rubik's cube solution that is the easiest to remember. It is also quick and easy to learn. I have also tried to make it as short as possible. I have called it the Rubik's cube solution for dummies. If you need more detail and explanations, please visit the detailed page on how to solve the Rubik's cube 3x3.
To successfully solve the Rubik's cube, you will need to follow a precise method. This method is made of different steps. To go from one step to the next, you will need to do a sequence of moves, also called algorithms. The Rubik's cube solution that I am introducing here is short and simple. If it is correctly understood and learned, it will allow you to solve (with some practice) every Rubik's cube, regardless of the scramble in under 30 seconds.
It is a very good Rubik's cube method to start with, because all the algorithms you will learn with this method will still be useful in case you opt for a faster method later.
Whether you are attempting to solve the Rubik's cube for the first time, looking for the shorter method d or an easier solution you are at the right place.
If you still need some help with the symbol representing the Rubik's cube faces, please visit the page on the universe of the Rubik's cube.
Finally, if you don't own a Rubik's cube yet, one can be purchased quite cheaply on the following link. Alternatively, have a look at our guide on which Rubik's cube to buy. Also if you are wondering how to choose the best cube for speed, have a look at our page on the characteristics of the best speed cube.
Step 1 : Build a cross
First of all, pick and choose a color. This color is going to be the color of the first solved layer. I always start with the white, and I would suggest you to do the same as the animations below start with this. This will make the explanations easier for you to understand. However, if you would rather pick another color, go for it !
This first step is not that difficult. Be careful though, the edges need to have the right colors on the side (on the first layer). It is important to differentiate a right cross from a wrong cross (please see below). If you actually built a cross but this is a wrong cross, it is quite useless and the mistake will need to be corrected before moving onto the next step.
Example of right cross
moves will appear here
Example of incorrect/wrong cross
moves will appear here
By the way, you can see how to fix the wrong cross by clicking on the 3D animation.
A few advises on this first step :
- The 6 center cubes of the Rubik's cube are not moving. Always identify them and use them as 'landmarks.'
- During this first step, try to keep the white face (and therefore the white center piece) on the bottom.
- If the white face is located on the bottom, you can turn the upper face as much as you want, it will not modify what has been built on the bottom face.
Solution step 2 : Finish the first layer
To finish the first layer, we will keep the white layer on the bottom. This will help us and make the resolution simpler.
Let's finish the first layer now. For this, we will need to solve the four remaining corners. As we mentioned with the edges, we will need to solve each corner correctly. Every corner goes to only one spot once the cube is solved. Again, identify the centers and use them to know how to solve the corners.
For instance, the corner with colors white-orange-blue must (once solved) be between the centers white, orange and blue. As we did before, the upper face can be turned without damaging what has been already built.
We usually proceed as follows : The first step is to locate a white corner that has not been solved yet. Then, we move the upper layer so that this corner is located just above where it should be once solved.
There are then three different cases to solve the corners. Here are the algorithms.
Case n°1 : white sticker is to the left
moves will appear here
Case n°2 : white sticker is to the right
moves will appear here
Last case (n°3) : white is on top
moves will appear here
We noticed that :
- Case 1 and 2 are one another symmetrical
- When solving case 3 we first bring the configuration to be the same as case 2
- This corner solving needs to be done for the four corners
We now have solved one layer. One layer is not only one face, but also the colors of the cubies on the side match with their respective centers.
Didn't give up yet? Let's move onto the next steps of this Rubik's cube solution.
Solution step 3 : Solve the second layer
The next step does not consist in building a second face and then a third face as above, but a second layer. Now you understand that people saying "I can't solve the Rubik's cube but I manage to solve 4 faces" don't know much about it.
The algorithm to solve the second layer is pretty simple. Two cases exist, they are symmetrical. So by learning one algorithm, you will quickly know the other one. Just be aware before you start the algorithm to correctly "prepare" the cube. The right color needs to be aligned with the center.
Case n°1
moves will appear here
Case n°2
moves will appear here
Last case where the edge is at the right place but the orientation is wrong
If you decide not to learn this algorithm, just do one of the algorithm shown above first. This will replace this edge by one from the yellow layer and therefore put the unsolved edge on the top layer. It will then be easy to solve this edge. The complete algorithm is shown below :
moves will appear here
Rubik's cube Solution step 4 : Yellow cross on the top layer
The following algorithm will be used to solve the yellow cross on the top layer. You may need to do it 2 or even 3 times in some cases. There are in total 4 different cases :
- Either no edge is yellow on top (the algorithm needs to be done 3 times)
- The 2 yellow on top edges make a straight line (the algorithm needs to be done twice)
- The 2 yellow on top edges make an angle (the algorithm needs to be done once)
- The 4 edges are already yellow on top (nothing to do !)
moves will appear here
Solution step 5 : Yellow face on the top layer
In this step, we will orient the corners so that they are all yellow on top. Here too, you may need to do the algorithm a couple of times (maximum 3) before being able to solve the corners. The two formulas are simple to know. They both solve (all the) cases where 3 corners need to be oriented. Here they are :
moves will appear here
moves will appear here
Solution step 6 : Solve the corners
There are now 3 configurations possible, and as always, just one algorithm will be needed. Make sure that the correct corner is in the back-left-top position, as you can see on the animation below. If you need to orient two opposites corners, just orient one to begin and then you will have the remaining two to orient.
moves will appear here
Corners should be fully solved by now. Let's solve the edges and we are done.
Final step : Edges permutation
The algorithm now permutes three edges. Be careful to put the solved edge in front of you before starting the algorithm. If you are not in this configuration precisely, just do the algorithm once and you will be there.
moves will appear here
Congratulations, your Rubik's cube is now solved thanks to our easy solution !!! 🙂
If you feel like you are going to be passionate and become a speedcuber,
Here is a selection of the best speed cube you can buy !